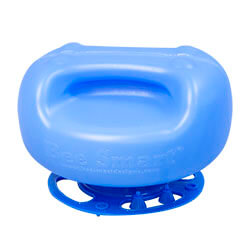
Need a feeder with your purchase of HiveAlive? Check out this feeder from Bee Smart Designs.
Faster & Easier Access to Syrup
No mess, no fuss, no spills
Eliminates Robbing
Minimize bee loss- no drowning
Check syrup level quickly
Refill without disturbing bees
- Great for early season Spring build up.
- Perfect for Fall feeding.
- Bees have close access to syrup at inner cover hole, not in cold space above.
- Perfect way to feed packages, nucs, splits and swarms for success.
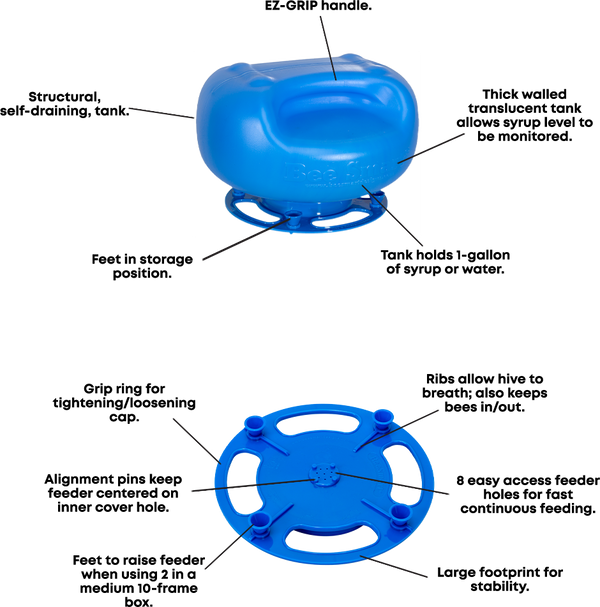
- Exclusive EZ-GRIP™ handle eliminates headaches.
- 1-Gallon capacity, self draining, structural tank.
- Fits inside Medium box; 1 in 8-frame or 1-2 in 10-frame.
- Swap/Exchange tanks out in seconds; no tools, no hassles.
- Check syrup level quickly, with translucent tank, without opening hive; just lift cover.
- Bees and Hive remain undisturbed when checking and refilling.
- Doubles as a Waterer or Outside Feeder.
How to use
Filling the Tank:
- Prepare the Tank: Place the tank on a flat surface with the handle down.
- Add Syrup or Water: Remove the cap and fill the tank with 1 gallon of room temperature syrup or water. Avoid using warm or hot syrup as it can create pressure and cause dripping. Don't forget to add HiveAlive!
- Fill to the Top: Make sure to fill the tank completely to create a vacuum. Partial fills won’t work properly.
- Secure the Cap: Screw the cap on firmly but don’t overtighten.
- Check for Leaks: Invert the tank while covering the nipple with your hand. If it leaks, reseal and tighten the cap.
- Store the Tank: Keep the tank stored with the nipple facing up. You can hold the tank by the side grips or the cap.
Installing a Single Feeder:
- Fill the Tank: Ensure the tank is filled to the top.
- Prepare the Hive: Place a medium or deep box on the inner cover.
- Position the Tank: Place the tank on the inner cover, holding it by the sides. Ensure the nipple fits into the center hole using the alignment pins for correct placement.
- Secure the Hive: Install the telescoping cover. Use a rock or strap to keep the cover in place.
Installing Dual Feeders or a Raised Tank:
- Fill the Tank: Ensure the tank is filled to the top.
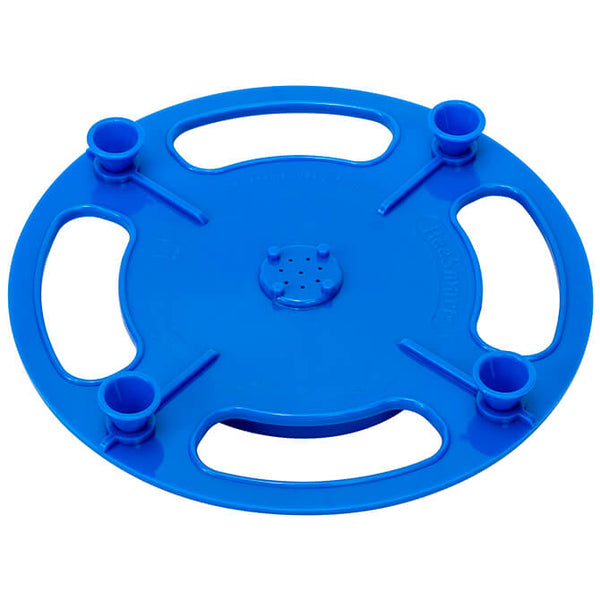
- Attach the Riser Feet: Remove the 4 riser feet from the cap and attach them to the bottom of the cap. The alignment pins should fit into the support rings.
- Store Riser Feet (Optional): When not in use, store the riser feet on the top side of the cap.
- Prepare the Hive: Place a medium or deep box on the inner cover.
- Position the Tank: Place the tank anywhere on the inner cover, holding it by the sides. For 8-frame boxes, use 1 feeder; for 10-frame boxes, you can use 2 feeders.
- Secure the Hive: Install the telescoping cover. Use a rock or strap to keep the cover in place.
IMPORTANT NOTES
■ The tank may drip a little until a vacuum is formed.
■ Always fill tank with room temperature syrup to prevent dripping from pressure build up from hot/warm syrup.
■ Fill the Tank to the brim before installing.
■ If tank continues to drip, make sure the gasket is properly seated and the cap is firmly screwed on. To test seal put hand over nipple and invert, if leaking re-seat/tighten cap. DO NOT OVER TIGHTEN.
■ Installing a partially filled tank will cause excessive dripping until vacuum is formed, always refill tank to top before re-installing.
■ Changes in temperature and barometric pressure may cause a small temporary drip.
■ Bee Smart Feeder MUST be used with an inner cover.
■ Works with any 8 or 10 Frame hive.
■ Syrup level is easily viewed without opening hive or disturbing bees


